Data Soap integration with Zapier
Zapier is the easiest and quickest way to automate tasks and integrate
with thousands of apps, websites & tools; including Data Soap.
Introduction
Zapier is the easiest and quickest way to automate tasks and integrate with thousands of apps, websites & tools; including Data Soap.
Data Soap
Validate UK and International mobile numbers, UK landline numbers and email addresses, as well as screening against the Telephone Preference Service (TPS), Corporate TPS and the Mail Preference Service in real-time. We also provide Unsubscribe Management tools to ensure you remain ICO compliant.
Zapier allows you to integrate Data Soap’s validation services into thousands of popular tools and services to ensure your customer and/or lead data is accurate and valid.
If you’re not already familiar with Zapier, it may be beneficial to take a quick look over their website to discover exactly how Zapier works:
To get started with Data Soap’s Zapier integration simply visit the below URL, or contact the Data Soap team directly.
Example use and setup
Introduction
In the following example, we’ll go through the setup of a Zapier app integrating with the Data Soap service to validate details entered via Facebook ads.
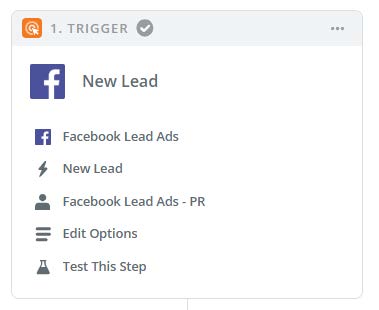
Selecting our Trigger
To begin with, we start by selecting our “Trigger”. You can find out more about Zapier triggers and actions in their how-to guides found here.
Choosing Data Soap
Following the setup of our “Trigger” we now proceed to selecting “Add a Step” and choosing “Data Soap” from the list.
If, however, Data Soap is not in your list, it means you’ll need an invite from Data Soap. To get your invite, simply click here or contact your account manager.
Once you’ve selected the Data Soap action, it’s then just a case of selecting the service you’d like to use. Zapier will prompt you to login with your Data Soap credentials first though, this is perfectly safe and will only need to be done once within Zapier.
You can add multiple “Action” steps within Zapier to use multiple Data Soap checks.
Let’s start by checking our Facebook leads mobile numer is valid by choosing “HLR”.

Setting up our Action to use data from our Trigger (Facebook)
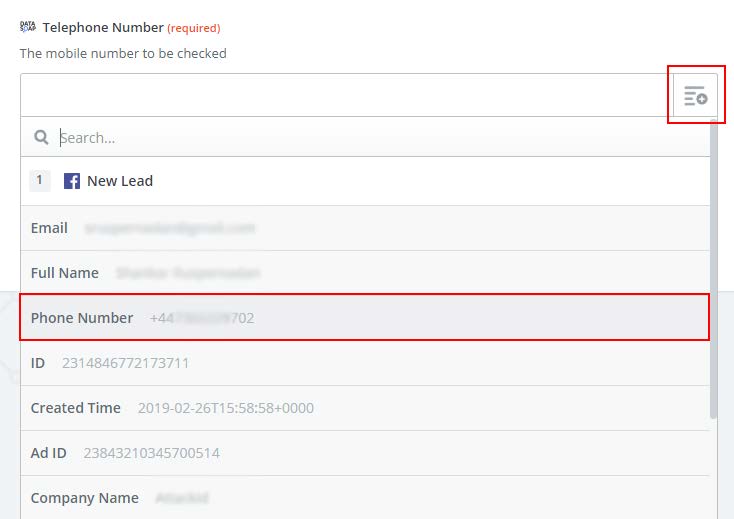
Simply click the button to the side of the “Telephone Number” input box to select data passed to our "Action" from the Zapier "Trigger".
In our case, we need the phone number data.
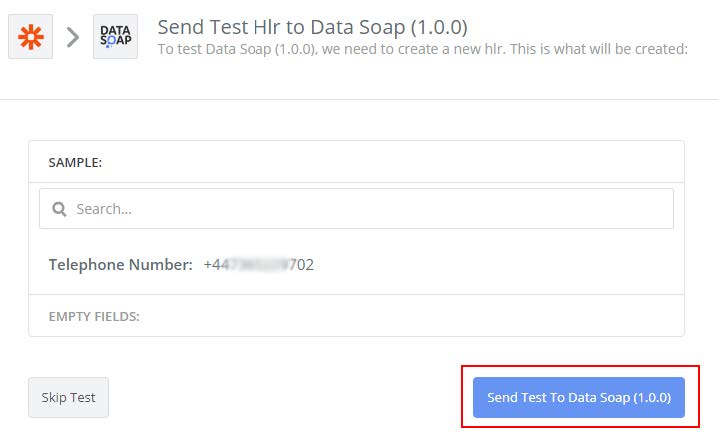
We can then send a test to Data Soap to ensure this “Action” is working as intended.
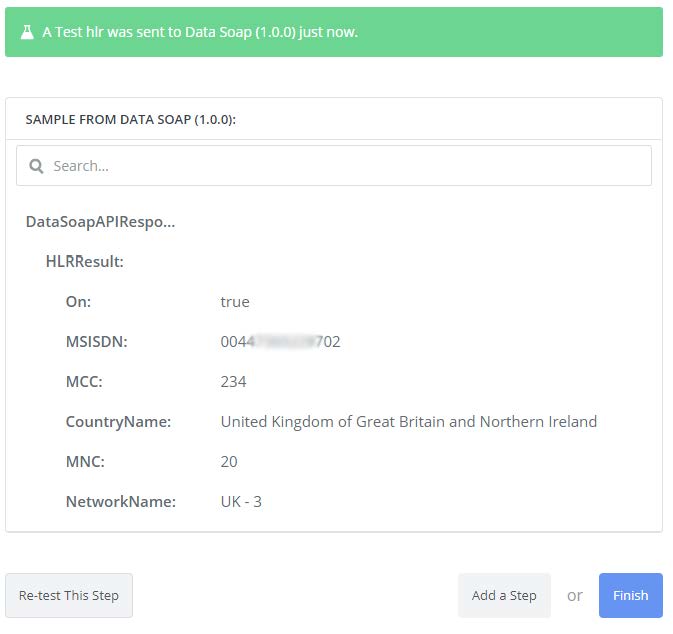
Zapier will then return a live validation result from the Data Soap API so we can double check everything is as it should be.
In this example, we can see the phone number we’ve got is currently turned on, it’s in the UK and on the Three mobile network.
Now, let’s check our new leads email address
First, we add another “Action” and choose Data Soap from our list as before. Then, we choose the Email Validation option.

As before, we now need to click the little button to the side of “Email Address” and select the email address data passed through from Facebook.
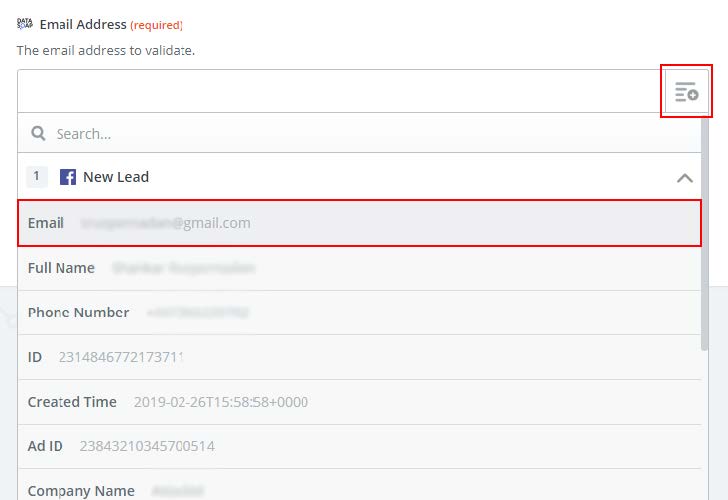
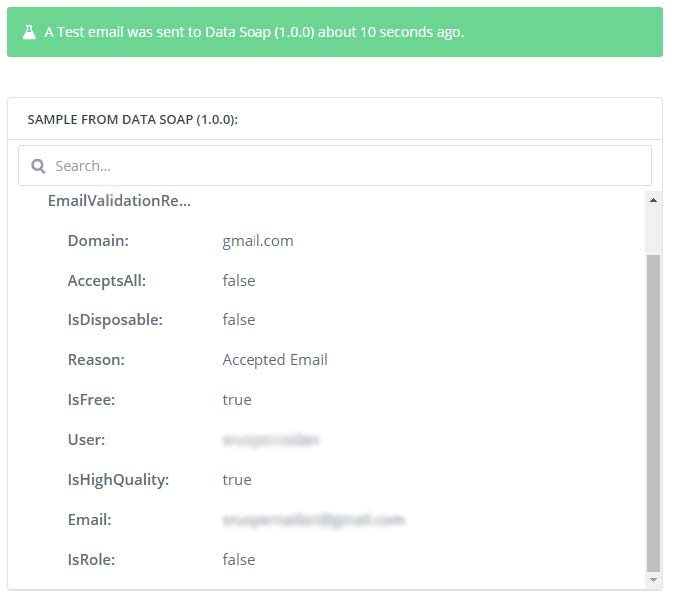
Now, we’ve got our data selected from our Facebook “Trigger”, it’s time to send another test through the Data Soap API to make sure we’ve set everything up correctly.
Below, we can see that this email address is valid and is accepting email. You can find out more information about the exact responses and their meanings over on Data Soap’s API documentation:
https://www.datasoap.co.uk/developer/synchronous-api#email
To remain GDPR compliant, we better check this number isn’t on the TPS
You should have this down by now, but just incase, we need to add another new “Action” and choose Data Soap from the list followed by the TPS Check option.

Once you’ve chosen this, you then need to select the little button to the side of the “Telephone Number” input field and then choose the data you’d like to use. Again, in our example this is the phone number passed through from Facebook’s Lead Advert.

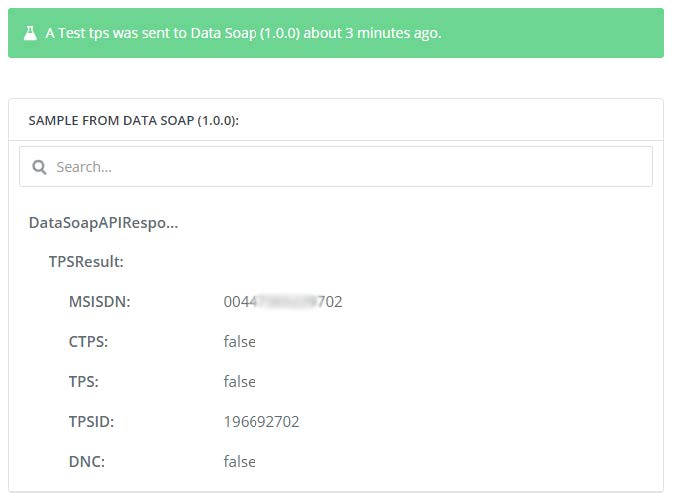
Now that we’ve chosen our data and setup our “Action”, we need to send another test over to Data Soap to double check everything is working correctly.
We can see in our example that this customer is not on the TPS or CTPS register, nor our internal DNC (Do Not Call) list.
Finally, let’s do something with our data
In our example, we’ll deposit this data into our Capsule CRM account. Here, you’d have the choice to store the record into your system with the Data Soap results, or depending on the results you may not want to do this.
For example: if the new lead is on the TPS, or has supplied invalid data, you might not want to store their details in your CRM.
In our case however, we’re going to store them in our CRM with the Data Soap results regardless of what they are.
So, we’ll select a new “Action” and choose Capsule CRM from the list of apps
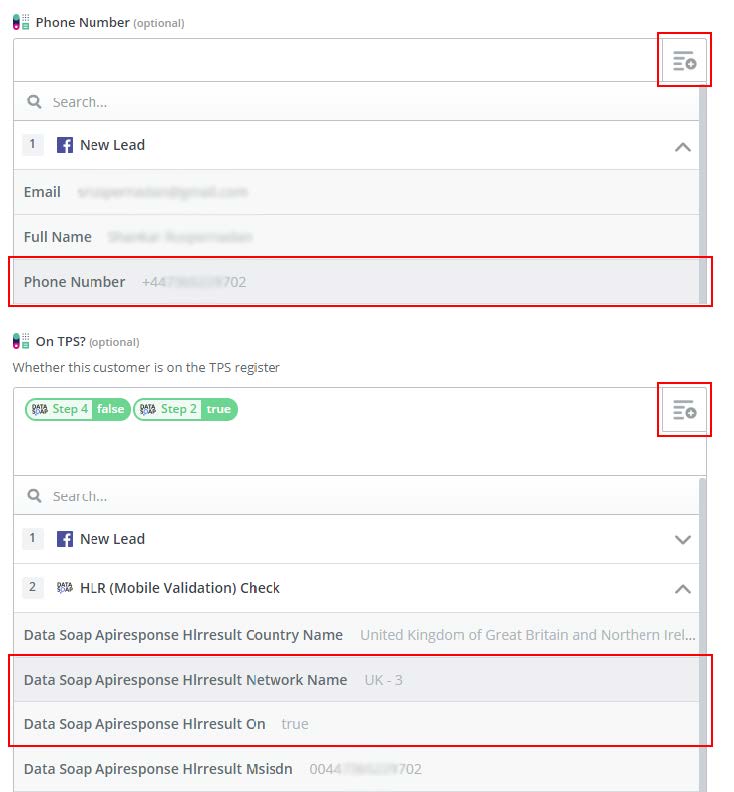
Once we’ve connected our account, and selected “Create New Contact” we then choose the data to use by clicking those little buttons to the side of the necessary input fields.
The examples below show the selction of the customers phone number from Facebook, along with the HLR results from the Data Soap checks.
That’s it, we’re done
That’s all the setup complete, we can now give our Zap a name and enable it to automatically validate all our data collected from our Facebook ads and deposit it all in our CRM with the Data Soap results.
For more information or help getting started with Data Soap via Zapier, simply get in touch with the Data Soap team.